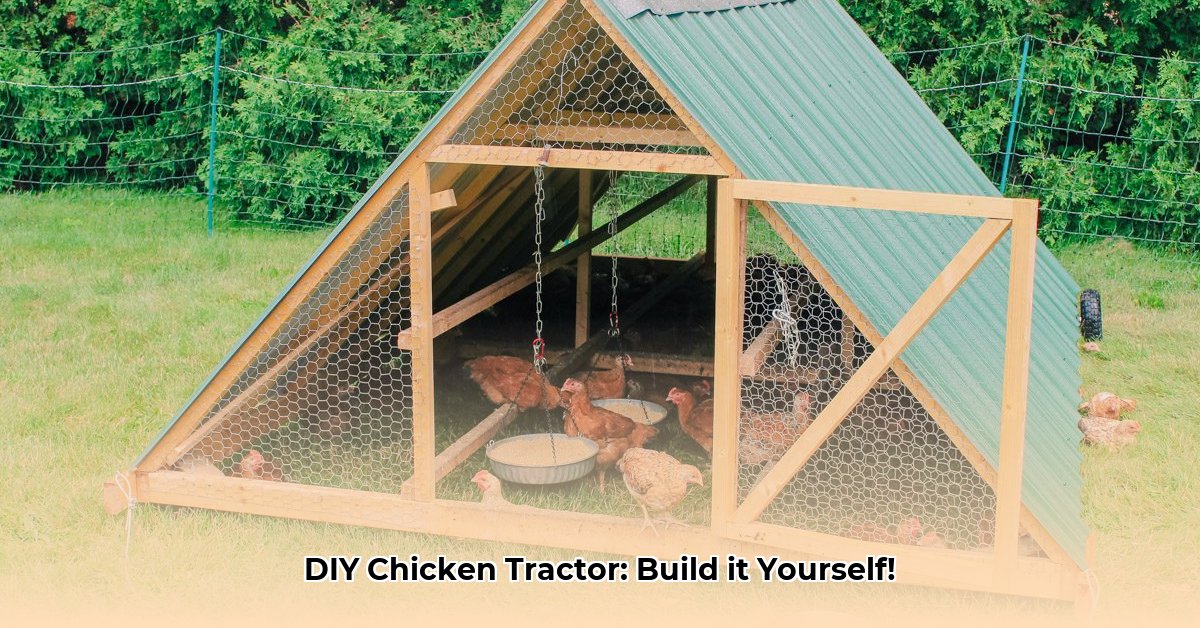
Want fresh, farm-fresh eggs without the hefty price tag of a commercial chicken coop? Building your own chicken tractor is a surprisingly simple and rewarding project! This comprehensive guide will walk you through each step, from design to construction, ensuring you create a safe, mobile home for your feathered friends. This project is perfect for beginners and seasoned chicken keepers alike. For larger flocks, check out this large chicken tractor design. Let's get started!
Designing Your Easy DIY Chicken Tractor: Planning for Success
Before you grab your tools, careful planning is key to a successful chicken tractor build. First, consider your flock's size; a general rule is 10 square feet per chicken to ensure ample space for comfortable roaming and pecking. Next, assess your climate. Harsh winters might require extra insulation to keep your hens cozy. And remember those wily predators! Use hardware cloth (a stronger alternative to chicken wire) to protect your flock. For your first build, keep it simple – a straightforward design is ideal for beginners.
Gathering Your Supplies: What You'll Need
Head to your local hardware store and gather these essential materials:
- Lumber: 2x4s for the frame and 1-2 sheets of plywood (the amount depends on your tractor's size).
- Hardware Cloth: Crucial for predator protection. Don't skimp!
- Wheels: Heavy-duty casters (consider the weight your finished tractor will hold). Making moving the coop a breeze is important.
- Hinges: Sturdy hinges for the door.
- Fasteners: Screws and nails appropriate for your chosen lumber.
- Optional Extras: Plywood floor (easier cleaning!), weather-resistant paint or sealant, and a small ramp.
Did you know that using hardware cloth instead of chicken wire significantly reduces predator intrusion? This one simple upgrade can greatly increase the safety of your chickens.
Building Your Easy DIY Chicken Tractor: A Step-by-Step Guide
Now for the construction! Follow these steps for a successful build:
Building the Frame: Cut your 2x4s to the desired dimensions (according to your design). Assemble them into a sturdy rectangular frame, ensuring square corners and tight joints for maximum strength and stability. This is the foundation of your chicken tractor.
Adding the Floor (Optional but Recommended): Attach a plywood floor securely to the frame. This greatly simplifies cleaning.
Attaching the Wheels: Securely fasten your heavy-duty casters to the frame, ensuring even spacing to prevent tilting. Consider adding wheel brakes for extra stability on uneven terrain.
Installing the Walls: Attach the hardware cloth firmly to the frame, ensuring a tight fit with no gaps. This step is critical for predator protection.
Adding a Door: Cut an appropriately sized opening and install your hinges. This allows easy access for feeding, cleaning, egg collection, and general chicken pampering.
Finishing Touches: Thoroughly inspect all joints, screws, and staples to confirm everything is secure. Apply paint or sealant for weather protection (optional but recommended).
Tips for Success with Your Easy DIY Chicken Tractor
Regular Relocation: Move your chicken tractor every 1-2 days to prevent overgrazing. Fresh pasture is essential for healthy chickens.
Weatherproofing: On windy days, weigh down the tractor to prevent it from blowing away.
Preventative Maintenance: Regularly inspect for damage. Addressing issues promptly ensures longevity and safety.
Troubleshooting Your Easy DIY Chicken Tractor: Common Issues and Solutions
Sagging Frame: Reinforce with additional supports or thicker lumber.
Predator Damage: Patch holes immediately with more hardware cloth. For extensive damage, you might need to rebuild that section.
Building your own chicken tractor is an incredibly fulfilling project! It's a wonderful way to provide a mobile, healthy environment for your chickens while enriching your garden soil. With a bit of planning, effort, and creativity, you'll have a safe and happy home for your flock. Happy Building!
How to Winterize a DIY Chicken Tractor for Cold Climates
Winterizing your chicken tractor will ensure your chickens remain safe, warm, and healthy through even the harshest cold seasons. Here's how you can protect your birds:
Assessing Your DIY Chicken Tractor's Cold-Weather Readiness
Before winter arrives, assess your tractor's ability to withstand cold temperatures. Are there drafts? Is it sufficiently insulated? Having a clear plan will determine what you need to add or amend.
Deep Litter: A Natural Insulation Layer
Create a deep layer of bedding (straw, shavings) at least 12-18 inches deep. As this decomposes, it generates heat. Monitor it regularly to prevent ammonia buildup.
Windbreaks: Protection from the Elements
Use straw bales, shrubs, or a fence to reduce wind exposure. Wind chill can significantly lower temperatures, and windbreaks are crucial for keeping your chickens warm.
Ventilation: Balancing Fresh Air and Warmth
Well-placed vents will ensure air circulation without creating drafts. Air circulation prevents ammonia build-up, vital for the health of your chickens.
Water Source Strategies: Preventing Frozen Water
Insulated waterers are a sound investment, and regularly changing the water will help prevent freezing. If necessary, use a heated waterer but always follow safety precautions.
Insulating Your DIY Chicken Tractor
In extremely harsh climates, add insulation such as foam board or even repurposed blankets. Focus on the sides and roof, mindful of maintaining airflow.
Supplemental Heating: A Considered Option
Supplemental heating should be carefully considered, taking into account fire safety and power outages. Heat lamps, if used, should be in wire baskets and regularly checked.
Monitoring Your Flock's Well-being
Regularly check for frostbite, lethargy, or respiratory issues. Adjust your winterization strategies as needed based on your observations and weather conditions.